1st Off topic comment - if you ever have poison sumac, Calagel works great! Even better than the prescription cortizone they gave me. After 1.5 weeks, I was going batty, so I needed something better. Oh, and I've NEVER been allergic to poison ivy or sumac. Guess I am now!
2nd Off topic comment - why do Nate Berkus and RAchel Ray have talk shows?
 3rd On topic comment, I just forgot to mention before. Make sure you LABEL the cabinets as you take them down with some #ing system, so you can put the same ones back in the place. Sometimes different cabinets don't fit back nicely in different places. Hubby's brainiac idea was to # them, and put the #'s under where the hinges were. I'm tired though now and I forget how they won't disappear when I paint over them? Maybe I put a small amount of tape there and don't paint there since the hinges will cover? I don't know. I agreed with him at the time. I'll have to ask again before i go painting over the #'s or something.
TODAY I got an early start and was up at 6am! Dropped the little one off by 7:15ish, and after a stop to get my Dunkin Donuts, and a little bit of research online, I was on my way.
SANDING and 1 Coat of Brushing Putty was on the agenda for today.

I gathered all my supplies - 150 grit sanding blocks and/or palm sander (if you are lucky enough to have this or a hubby with lots of tools), tack cloths, wood filler and shop vac (again perk, i would borrow one from someone as they are much better than your house vacuum)

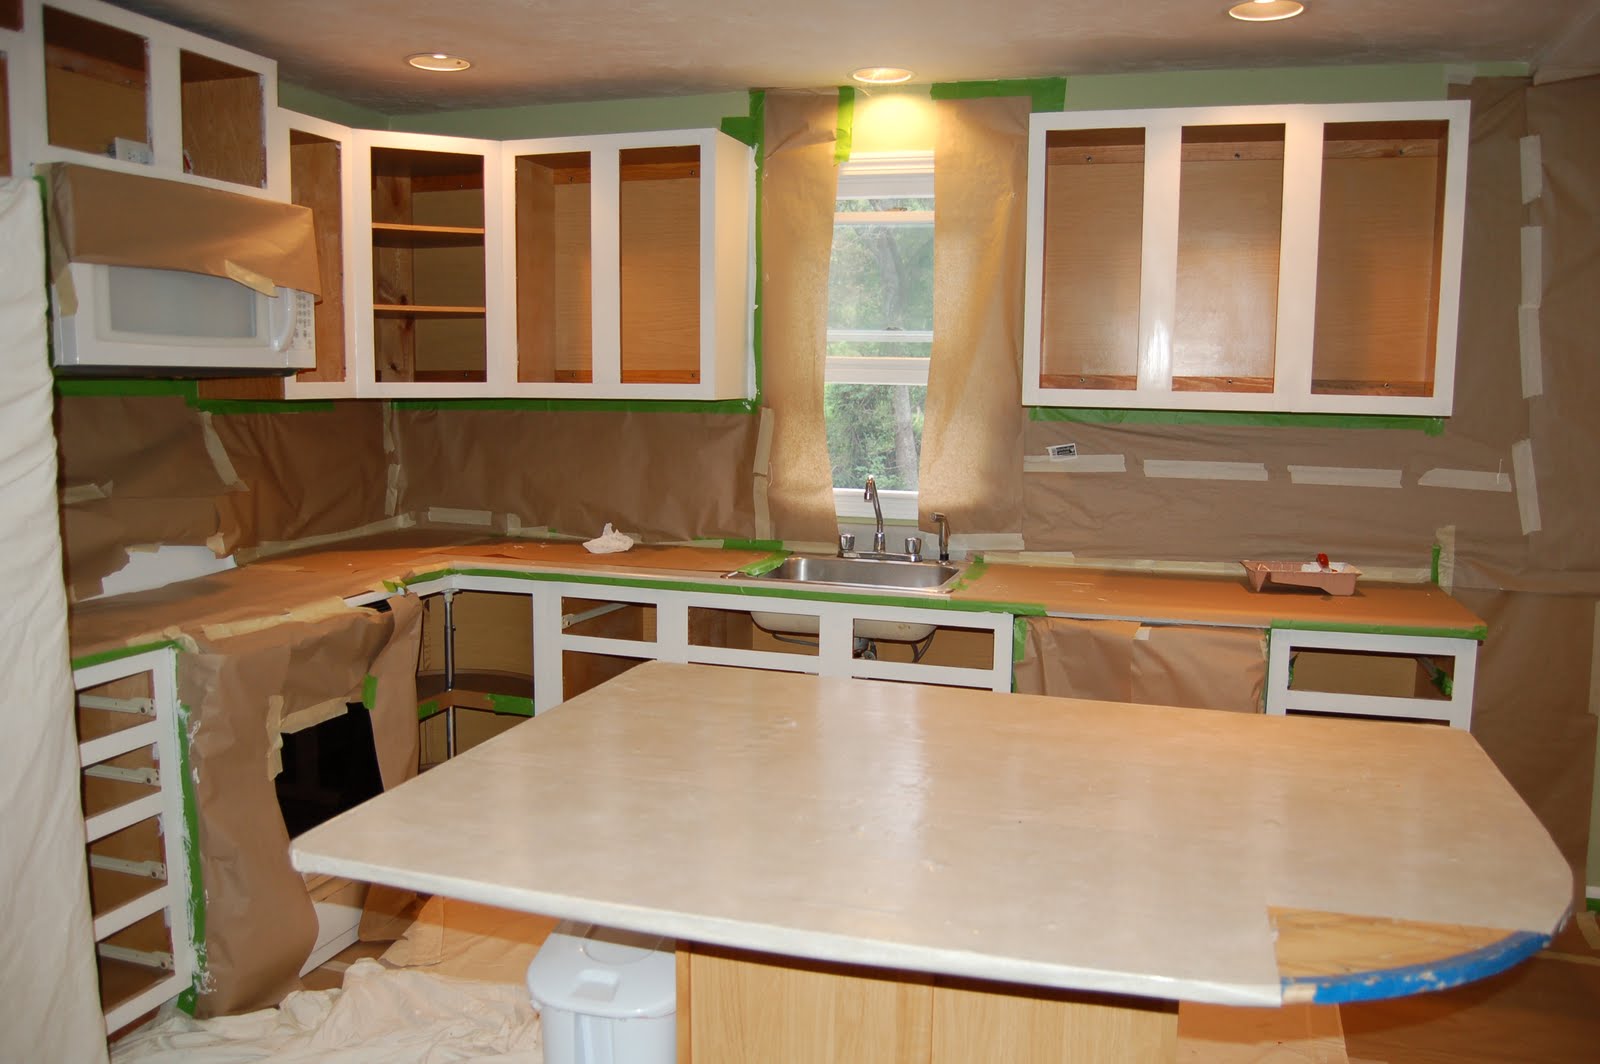
Then I prepped the area by covering everything so it wouldn't get any of the dust from sanding. Remembered I piled everything in the corner, so now I had to cover. You just don't to spend your time rewashing dust off everything.

I also wanted to tape the hallways to the living room, so dust didn't float into there as much as possible.
 LESSON LEARNED - don't try to hang heavy plastic to ceiling by yourself with just tape. After about 15 min., I thought about thumb tacks in the ceiling, and THEN, putting the tape.
 Use masking tape or the cheaper painters tape (blue) to seal everything off.


At 9:45 I already had to run out to Home Depot to get more tape.
Don't forget the fridge, stove, microwave, etc. Anything you don't want to be vacuuming dust particles out of as much as you can.

NEXT I needed to search for a dust mask, and I knew i had one from many projects, or hubby had one. And, some goggles. So, I went searching in the very messy basement where most of our painting supplies are. Nope. Then, I ventured into the garage and "tried" to look through hubby's stuff.
Would you be able to find them in here? Wait, are those 3 boat engines???


Ohhhhh, look it, my roller skates from my Hermosa Beach, CA days! (why I ever brought those back East I'll never know)

Finally, I called hubby and he said the masks were in the organized box area on the shelf. Oh, that's right, I remembered he did spend 1 day organizing at 1 point...guess that was worth it! bingo!


So, I off I went sanding!

I tried the palm sander, but as quick as it is, the thing sort of scares me. There really isn't anything good to grip on when you are doing the cabinet bases/vertical planes.
The sanding blocks worked much better (ABOVE), so I just used those. I don't think it was any more work. Just get the good ones with the angles on the edges. Remember, you are just "roughing it up" and scuffing it so the primer sticks. I probably did more than I should, but I wanted to make sure all the varnish was off (that the TSP/light deglosser didn't get)


After you sand, shop vac insides, faces, everything. THEN use a tack cloth (or damp rag) to get the last bit off dust particles off of everything. You want NO dust.

By now it was only about 2pm, so I figured I would try to get at least 1 coat of the Brushing Putty on the cabinet faces to hide the grain there.
So, I had to finish prepping the area with masking paper and the Green Frog Painter tape for anywhere the brush might hit. Since it wasn't time for spraying, I didn't have to totally cover everything, but I did a lot of it. If you've ever seen me paint with a brush, I'm not neat or careful. i'm a perfectionist, but i have no patience and end up with paint everywhere.

Finally I opened the can of the infamous Brushing Putty! I shook it REALLY well. It's thicker than normal paint and has a strong smell since it's oil based. So make sure area is well ventilated and maybe use a mask as well.

they said to apply thick and heavy (unlike when you prime a wall). Which is good, as when I prime walls I have a tendancy to forget more layers of paint will come and I apply heavy.

It doesn't stay wet very long, but doesn't really get dry. almost a wet/tacky. So, if you are trying to go over and over and fixing brush strokes, it can be difficult. Supposedly the brush strokes somewhat level out and disappear. We'll see.
 I finished all the faces, and 2 drawers and 2 doors, by about 5:30. I did one draw that was in really bad shape, and one that was in better shape to see how good it fills.

After about 1 hour or so of drying time, some areas looked 'SMOOTH AS GLASS' and some areas you could see the tackier brush strokes. Hard to tell in these pics (BELOW), but this what I think it's suppose to look like all over if applied really thick - it's super smooth already with no grain. And, I haven't even sanded it down yet!


When I looked after about 2-3 hours, I had mixed feelings. Some areas you could still see the grain (not the color, the pourous wood openings) and some looked fantastic and SMOOTH. Again, some areas you can see where I tried to fix brush strokes where it was already tacky. Hopefully sanding will fix that. I was hoping to only do 1 coat on the faces, 2 on the door and drawer fronts. But, I may have to do some touch up 2nd coats on the fronts.
We'll see tomorrow!
No comments:
Post a Comment