Tuesday, June 14, 2011

DAY 4 - Kitchen Cabinet Painting Project

Tues., June 14th - Flag Day ( I only know this as it's also my brother's b-day)


1st Off topic comment - if you ever have poison sumac, Calagel works great!  Even better than the prescription cortizone they gave me.  After 1.5 weeks, I was going batty, so I needed something better.  Oh, and I've NEVER been allergic to poison ivy or sumac.  Guess I am now!


2nd Off topic comment  - why do Nate Berkus and RAchel Ray have talk shows?  


3rd On topic comment, I just forgot to mention before.  Make sure you LABEL the cabinets as you take them down with some #ing system, so you can put the same ones back in the place. Sometimes different cabinets don't fit back nicely in different places. Hubby's brainiac idea was to # them, and put the #'s under where the hinges were.  I'm tired though now and I forget how they won't disappear when I paint over them? Maybe I put a small amount of tape there and don't paint there since the hinges will cover?  I don't know. I agreed with him at the time. I'll have to ask again before i go painting over the #'s or something.


TODAY I got an early start and was up at 6am!  Dropped the little one off by 7:15ish, and after a stop to get my Dunkin Donuts, and a little bit of research online, I was on my way.


SANDING and 1 Coat of Brushing Putty was on the agenda for today.  


I gathered all my supplies - 150 grit sanding blocks and/or palm sander (if you are lucky enough to have this or a hubby with lots of tools), tack cloths, wood filler and shop vac (again perk, i would borrow one from someone as they are much better than your house vacuum)


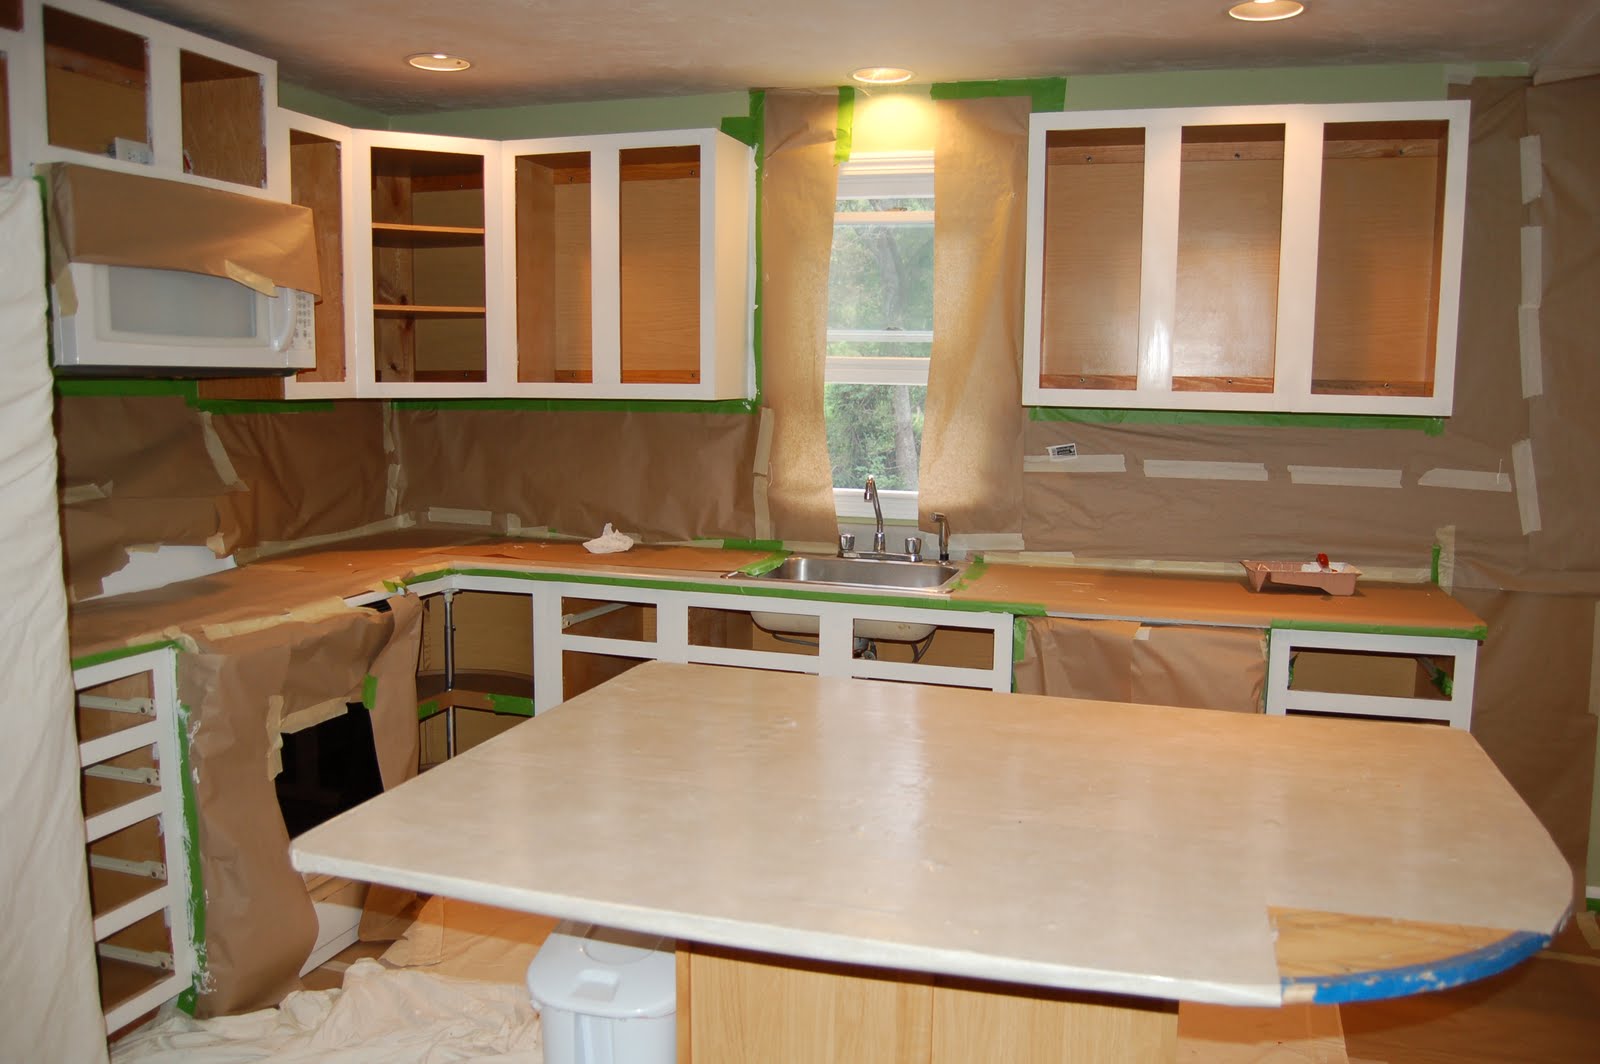
Then I prepped the area by covering everything so it wouldn't get any of the dust from sanding.  Remembered I piled everything in the corner, so now I had to cover. You just don't to spend your time rewashing dust off everything.

I also wanted to tape the hallways to the living room, so dust didn't float into there as much as possible.  
LESSON LEARNED - don't try to hang heavy plastic to ceiling by yourself with just tape.  After about 15 min., I thought about thumb tacks in the ceiling, and THEN, putting the tape.   
Use masking tape or the cheaper painters tape (blue) to seal everything off.  


At 9:45 I already had to run out to Home Depot to get more tape.

Don't forget the fridge, stove, microwave, etc. Anything you don't want to be vacuuming dust particles out of as much as you can.  
NEXT I needed to search for a dust mask, and I knew i had one from many projects, or hubby had one.  And, some goggles. So, I went searching in the very messy basement where most of our painting supplies are. Nope.  Then, I ventured into the garage and "tried" to look through hubby's stuff. 

Would you be able to find them in here? Wait, are those 3 boat engines???

Ohhhhh, look it, my roller skates from my Hermosa Beach, CA days!  (why I ever brought those back East I'll never know)


Finally, I called hubby and he said the masks were in the organized box area on the shelf.  Oh, that's right, I remembered he did spend 1 day organizing at 1 point...guess that was worth it!  bingo!
 

So, I off I went sanding!
I tried the palm sander, but as quick as it is, the thing sort of scares me. There really isn't anything good to grip on when you are doing the cabinet bases/vertical planes.  
The sanding blocks worked much better (ABOVE), so I just used those. I don't think it was any more work.  Just get the good ones with the angles on the edges.  Remember, you are just "roughing it up" and scuffing it so the primer sticks.  I probably did more than I should, but I wanted to make sure all the varnish was off (that the TSP/light deglosser didn't get)

After you sand, shop vac insides, faces, everything.  THEN use a tack cloth (or damp rag) to get the last bit off dust particles off of everything.  You want NO dust. 

By now it was only about 2pm, so I figured I would try to get at least 1 coat of the Brushing Putty on the cabinet faces to hide the grain there. 

So, I had to finish prepping the area with masking paper and the Green Frog Painter tape for anywhere the brush might hit.  Since it wasn't time for spraying, I didn't have to totally cover everything, but I did  a lot of it.  If you've ever seen me paint with a brush, I'm not neat or careful.  i'm a perfectionist, but i have no patience and end up with paint everywhere.
Finally I opened the can of the infamous Brushing Putty!  I shook it REALLY well.  It's thicker than normal paint and has a strong smell since it's oil based. So make sure area is well ventilated and maybe use a mask as well.

they said to apply thick and heavy (unlike when you prime a wall). Which is good, as when I prime walls I have a tendancy to forget more layers of paint will come and I apply heavy.  

It doesn't stay wet very long, but doesn't really get dry. almost a wet/tacky. So, if you are trying to go over and over and fixing brush strokes, it can be difficult. Supposedly the brush strokes somewhat level out and disappear. We'll see.

I finished all the faces, and 2 drawers and 2 doors, by about 5:30.  I did one draw that was in really bad shape, and one that was in better shape to see how good it fills.


After about 1 hour or so of drying time, some areas looked 'SMOOTH AS GLASS' and some areas you could see the tackier brush strokes.  Hard to tell in these pics (BELOW), but this what I think it's suppose to look like all over if applied really thick - it's super smooth already with no grain. And, I haven't even sanded it down yet!


When I looked after about 2-3 hours, I had mixed feelings.  Some areas you could still see the grain (not the color, the pourous wood openings) and some looked fantastic and SMOOTH.  Again, some areas you can see where I tried to fix brush strokes where it was already tacky. Hopefully sanding will fix that.  I was hoping to only do 1 coat on the faces, 2 on the door and drawer fronts. But, I may have to do some touch up 2nd coats on the fronts.

We'll see tomorrow!

Monday, June 13, 2011

DAY 3 - Kitchen Cabinet Painting

Monday, June 13, 2011

Today was Day 1 of Vacation and Day 3 of my project.  Having an 18-month old definitely hinders the amount of time you have to work on the project.  No getting up early to start, nor burning the midnight oil to power through.  She slept late (and I use her as my alarm clock) and then I had to bring her to daycare.  Also, I still had about 3 hours of work to finish up this a.m. before I could be "off" for the week.  So, a slow start again today.

Oh, and Hubby was off golfing with the guys (and Lori) in my family.  It was planned already and ACTUALLY, I liked it!  No hubby with comments and no baby running around. Just me and my project and bad daytime TV.

First, I did talk to the FPE rep and he said it was ok to use TSP and/or a liquid deglosser to degrease and get rid of the grime.  Then, as I already knew, he said to:  scuff sand, vacuum, tack, brushing putty, sand, prime, sand, paint, sand, paint.  He also said MOST people use the ECO Satin vs. the ECO Brilliant. Both are equally as durable. It's really a personal choice for finish/sheen.  I also posted the ? on the GardenWeb/iVillage boards and many said the FPE ECO Brilliant is really shiny. So, I will stick with the ECO Satin.

I finally started about 12:30 and removed contact paper from the bottom of 4 of the cabinets in case we do paint the insides.  I tried the orange oil (Goo Gone), but really just using  my nails and a screwdriver and some patience with pulling, and it came up.  The Goo Gone didn't really dissolve the adhesive as I had hoped. oh well, I still got it off and it was only 4 bottoms.
Then, I prepped the area to start the degreasing with the TSP spray I already had from the bathroom cabinet test project (BELOW PIC). I was going to run out and get a liquid deglosser, but the TSP bottle said it also deglossed and I figured I was going to sand anyway. So, i didn't think i needed a strong chemical deglosser.  The cabinets really didn't seem extremely dirty, even for 17 years old.  We had wiped them down when we moved into the house 4 years ago.  So, hopefully I made the right choice. oh and Amy Matthews from DIY network said to use this one  ;o)
 
This brand has no chemical smell.  And, you don't need to wipe off with water after.  Just a dry rag. Also, make sure to wear protective gloves.  They suggested goggles as well, but I ignored that. Just be careful when spraying.

There are some warnings about the TSP getting on surfaces, so make sure you throw down a drop cloth on your countertop and floors if you care about it. And mask off the walls, as it will rub off the paint slightly.  Remember, its stripping off the varnish, as well as grease from your cabinets, so it will dull your walls.  It warned to be careful of appliances, wood floors and stainless sinks/appliances, etc. as well.
I started to mask off part of the walls, and used the painters tape.  That new bright green FrogTape brand worked well when I painted the bathroom. It's more expensive than the blue stuff, but less bleed through.  So, don't waste it.  For the area's where the paint won't really touch or have a chance to bleed through, you can just tape the masking paper (or plastic) with regular masking tape. It's cheaper. Of course, after I sand I will probably have to remask as I don't know how I'm going to vacuum all the sawdust up and it not suck up that thin paper. We'll see.    Tomorrow that might be a "Lesson's Learned" #1.

Vacuum out cabinets with Shop Vac or just your regular vaccum if you are going to clean and paint the insides. Luckily I have a Hubby with lots of tools.

Next I grabbed a bunch of dry rags to wipe the TSP, a few scouring sponges and steel wool, Q-tips and a Safety Pin.  You probably should get newer rags, but I used some older ones that I had from other projects.  Basically the idea is to remove the dirt, not spread more around.  They seemed ok though.
I wouldn't use the steel wool or anything that really scrubs, if you plan on wanting to see the grain finish.  I knew I would be sanding and DO NOT want to see the grain and using that grain filler.  The steel wool REALLY scrubs the grime off, especially in those corners (CLICK ON ABOVE).  I would use that or just a scouring sponge, especially on the cabinets that are closest to stove and sink area.

Otherwise I just sprayed, waited about :30, then wiped with the dry rag.  if you do scour, just make sure you wipe with paper towels or rag. maybe use a wet rag, then dry rag.  No matter what you do, you want all the residue gone and it to be dry after.  Q-tips help with the corners and grooves.  Safety pin for those corners where the grime will just not budge. I resprayed a few times for those tough corners, grooves and grimier cabinets.

Everything I read said PREP and CLEANING is VERY IMPORTANT to how it will finish.  


And, by looking at the rags afterwards, you can see how much dirt comes out! Granted, some of it is the wood/varnish, but a lot is built up dirt.  Oh, i thought about using a toothbrush after the fact.  oh well.
All in all it took me about 4 hours and I was done at 5:05, just in time to clean up and go pick up Kaitlyn. I also cleaned the insides, but really did a quick wipe compared to the outsides.  (all the shelves we decided we would just buy new melamine ones or cover existing in white contact paper as if we paint them, the dishes, etc. will just scrape the paint off)

Here is my DONE pile ready to sand tomorrow!

On a cuter side note, I hear Kaitlyn snoring on the monitor.  ;o)  

Sunday, June 12, 2011

DAY 2 - Kitchen Cabinet Painting Project

Sunday, June 12, 2011
Today I was hoping to get all of the door and drawer fronts off, clean/degrease with TSP, sand and maybe get 1 coat of the Brushing Putty on. 


Well, not much was accomplished today.  It was a slow start after the few hours I spent setting up my blog this a.m. Worth it, but it wasted time. 


Today was really about more prep work and research anyway, so that is ok.


I made a list of the additional supplies I needed - painters tape, masking paper, tack cloths, sanding blocks, etc.  Luckily we already have a ton of stuff since we have painted every wall, trim, window and door in this house.  Home Depot is 1/2 mile from our house, but since I had time, I headed to Lowes for a change of pace.  I figured  I'd be in Home Depot often enough, as even if you think you have everything, inevitably, you always need to run out for something else.


My trip was fairly quick, but when I got back i ate lunch and then did some more research and posting questions on message boards.  


Really, hubby and I debated back and forth as to whether we should paint the inside of the cabinets or not. I still don't even think we've decided. We looked at the inside of some white and cream cabinets in Home Depot and Lowes, and many actually had oak/tan partical board insides. They weren't white.  So, even professional cabinets are unpainted inside.  We just don't want it to look crappy.


I basically just taped masking paper over the hardwood floors.  I'll still throw down some drop cloths, but just added protection for our new floors.  of course, hubby told me  I was suppose to use the tougher Rosin paper.  oh well.  


Kaitlyn enjoyed the new floors and ran and ran in circles.  She went to bed early.
I took a break and caught up on the episode of Mad Men Season 4 i fell asleep on and watched Kaityln.  Hubby took all the draw fronts, cabinet fronts, etc. down so I could start cleaning/degreasing them.  However, since I still wasn't positive if I can use TSP to clean with the FPE Brushing Putty, I decided to end the project there.  Plus the chemicals and sanding wouldn't be good with Kaitlyn around. She'll be at daycare tomorrow.


I did email the Fine Paints of Europe rep with my questions and I'll call him tomorrow. 


Apparently they are very helpful.  The reason for my quandry,  is sometimes what you use as a degreaser or deglosser, it can affect how the grain filler or primer adheres to the wood.  And, you want it to adhere and not chip off.


Anyway, progress is slowly being made and luckily i still have 7 days off to accomplish most of it.  Hopefully I'll get a call tomorrow saying I won a sweepstakes and then I can stop.


Remember, projects ALWAYS take 2x as long as you think they do. 

Painting Kitchen Cabinets

Saturday, June 11th, 2011

This is NOT my 1st foray into Sweat Equity projects.  We have already completed a handful of sweat equity projects on our house.  I also tackled a huge project at an apt. in CA once - removing wallpaper.  Yeah fun.  Maybe I'll write about those experiences another time.

I think this will be one of my bigger projects, and hence, a blog is necessary. First, it’s necessary, as it will be cathartic.  Second, I have many others who are curious on the process, as they are going to attempt this sweat equity project as well.

Painting Kitchen Cabinets.

Just typing it makes it a daunting project. 

However, hubby and I have decided this is the best option since we don’t have the budget to install new cabinets.  Our budget savings will afford us to purchase granite countertops, build an island, and purchase stainless steel appliances….Eventually.  We are fortunate enough to be fairly handy (he more so than I), and therefore we can use “sweat equity” to give our kitchen a facelift into the year 2011 vs. 1994.  This will save us $$$ on contractor costs and will hopefully make our kitchen more appealing if we decide to sell in a few years.

BEFORE PICTURES:
NOTE:  ignore the kitchen cart/fake island with plywood countertop.  That is just temporary.  Also ignore blue-gray laminate countertops and old appliances. Eventually, all will be changed.


Bye bye ugly corner thing/snack cabinet.


STEP 1 - Enter sweepstakes in hopes you don't have to do this.
Enter those HGTV and DIY network sweeps where you can win $50,000, in hopes that you can use that money to actually buy cabinets, or pay someone to do this.  I work in promotions, people really do win sweepstakes. Apparently, just not me.

STEP 2 - Take time off
If you work, take 1 week vacation off if you can.  If you want it done right, it's not a weekend project.  I'm only on Day 1 and I'm already behind.  (maybe b/c I'm blogging??)

STEP 3 - Do a little research and decide on course of action
The power of the internet helped me to research what paint to use, whether to use a brush or spray, as well as other's experiences in this daunting task.  Many of us have the lovely contractor grade honey-oak cabinets, and need a way to update the look. You may like this look, and that is fine.  We don't. Just like many don't like the look of white cabinets.  To each his own I guess.  Although, it could be the '90's gray-blue laminate countertop, as well as old appliances and a once blue checkered laminate flooring that has spawned my hatred for these cabinets.  They are in good shape, and this is our budget option until I win one of those HGTV or DIY Network sweepstakes. 

STEP 4 - Pick your Paint
After researching online, i decided to go with the top of the line paint called "Fine Paints of Europe".  Mainly because they have this grain filler called Brushing Putty and I do NOT want to see the grain marks if I can help it.  And, you want good paint that will last and not chip.  Benjamin Moore was a 2nd option.  Hence, I purchased the whole line, that doesn't even come in a Gallon, but a Euro-gallon.  So a drive to Cape Cod to the closest store in the area that sells this stuff , a call by the clerk the FPE rep, and I have: 2 quarts of Brushing Putty (hoping to return 1 can), 1 euro-gallon of oil-based undercoat/primer and 1 euro-gallon of Eco Satin water based paint, all in White for $300.  Which, isn't bad compared to the $1,000's we would spend on new cabinets or a contractor.  That is my rationalization.  Hubby only had minor disagreements on this one.  Hubby also has a sprayer, so I had to take that into account when choosing a paint.  I'm hoping this will cut down on my aggravation of seeing brush strokes. We'll see.  

STEP 5 - Coffee
This is absolutely necessary – get a Medium regular Ice Coffee from Dunkin Donuts.  Just get coffee, no matter what your preference.  As your mind and body will need that boost of energy to still believe starting this project was a good idea.  Trust me, at 11am, i was already doubting myself.  It probably should be STEP 1.

STEP 6 - "Mise en Place" in french means "Everything in it's place"
This is a cooking term hubby's friend Beau used on his cooking show (or maybe it was that other chick on the show?). I love to use it, as I need to have everything organized and not hectic as I begin a project. Remember, a main, functional area of your house will be a disaster zone for at LEAST 1 week, if not more.  

STEP 7 - Empty the Kitchen Cabinets and put the gates back up
I have a 18 month old girl.  She likes to "help".  Well, the baby-gates went back up for her safety and my sanity.  She is not happy.  Except that she gets to play in the empty the kitchen cabinets.
Oh yes, you need to empty your cabinets.  If you are not painting the insides, you probably don't have to fully empty, but as much as a pain as it is, I think it will be better in the long run.  However, as i've moved MANY times, don't just hastily throw things in boxes, as it's a nightmare when you unpack.  Try to be somewhat organized.  We were able to move most items into the dining area, hutch, or in a closet. Try to do this as you don't want to be wrapping glasses, plates, etc. Remember to keep some key items out that you'll need for the next few weeks.


That is all I accomplished on DAY 1.  I did have a 3hr. hiatus where hubby I discussed some options and then went to Home Depot to look at hinges and knobs. oh and a lunch break at the Cabby Shack sans the "bebe".  We figured, on Day 1 we are still on speaking terms. let's go enjoy a lunch.  By, the end of the week, we'll see.


Now, at 11am on Sunday and 2hrs. of figuring out this blog, I start DAY 2.  (see what I mean about delays)